Dashboard trim panels — removal and installation
Warning: The models covered by this manual
are equipped with a Supplemental Restraint
System (SRS), more commonly known as airbags. Always disarm the airbag system before working in the vicinity of any airbag system component to avoid the possibility of accidental deployment of the airbag, which could cause personal injury (see Chassis electrical system). Do not use a memory saving device to preserve the PCM’s memory when working on or near airbag system components.
Caution: Plastic trim tools must be used on all operations in this Section to avoid damage to the soft plastic interior parts (see Upholstery, carpets and vinyl trim — maintenance).
1. Disconnect the cable from the negative terminal of the battery (see Engine electrical systems).
Knee bolster
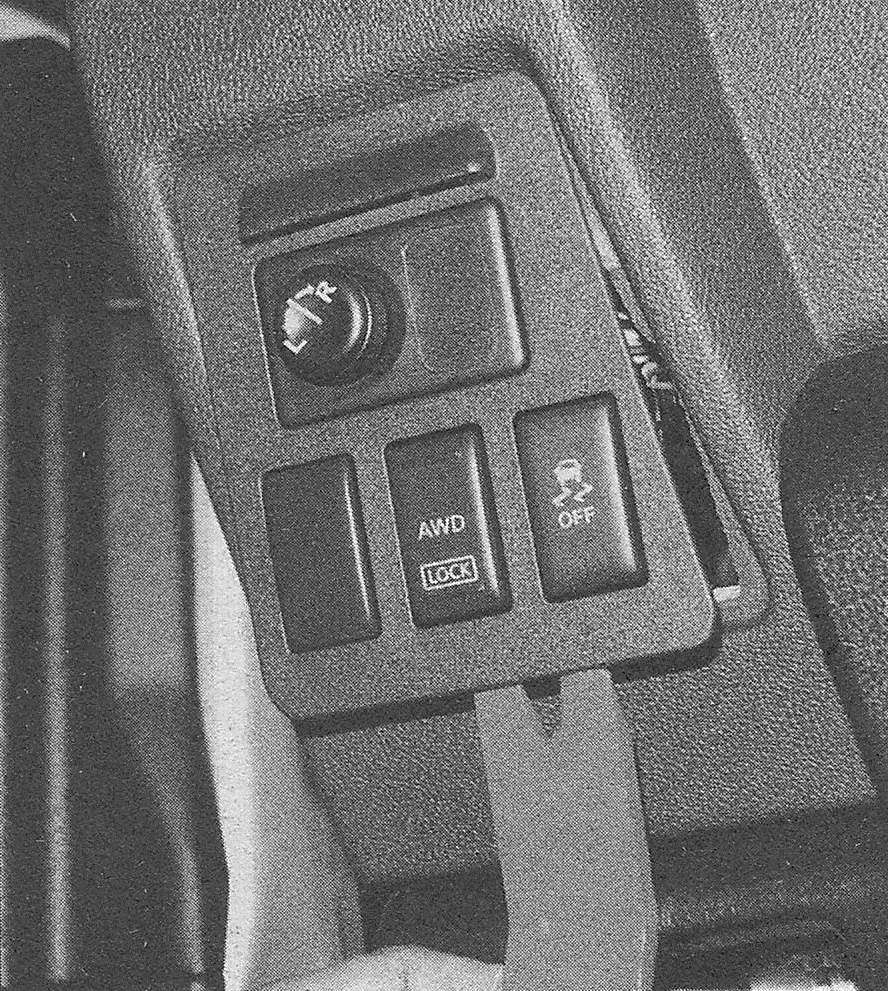
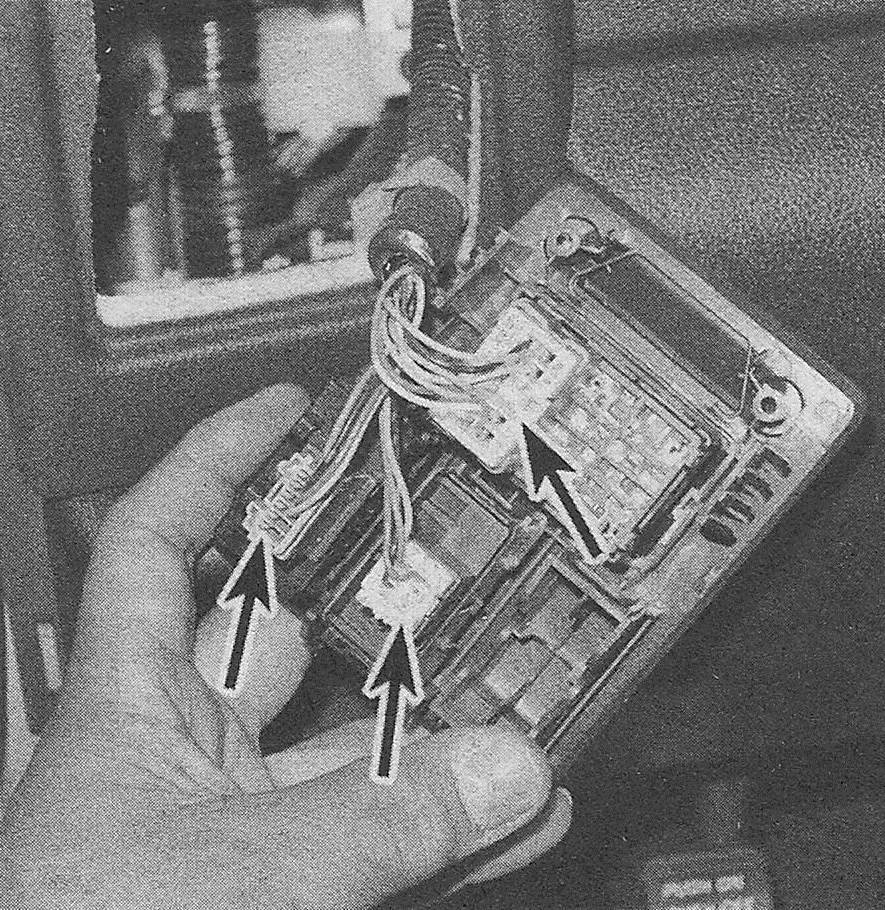
2. Pry out the mirror switch and AWD switch panel (see illustrations).
23.2a Pry the switch panel out
23.2b… and disconnect the electrical connectors
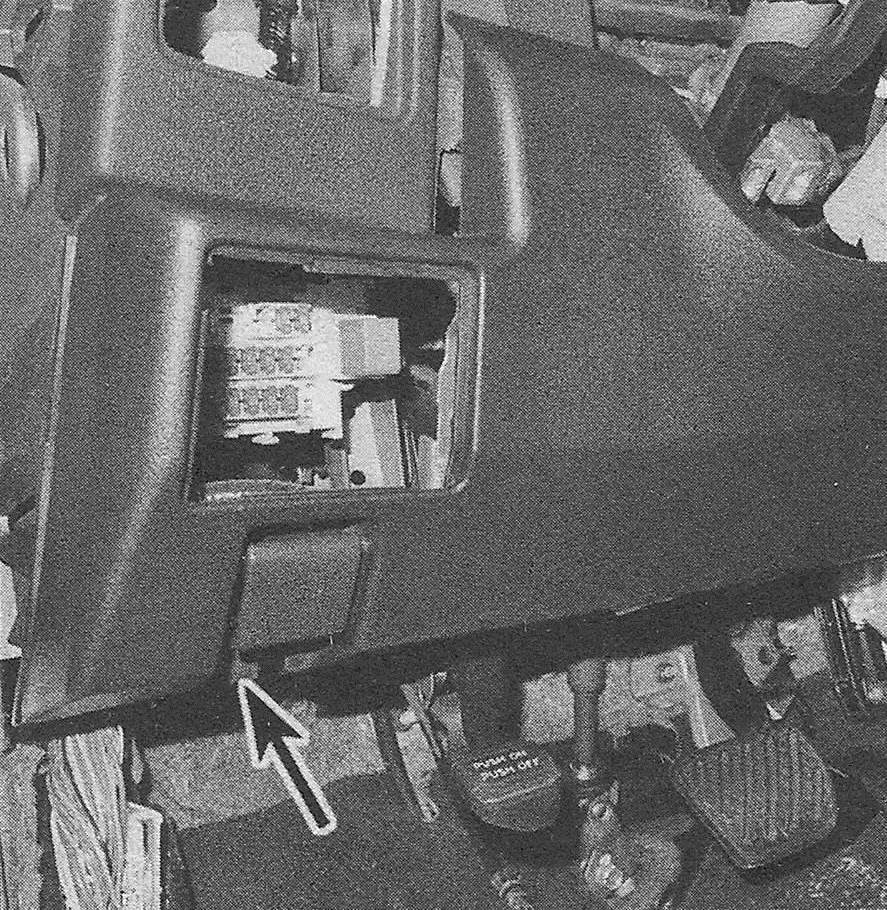
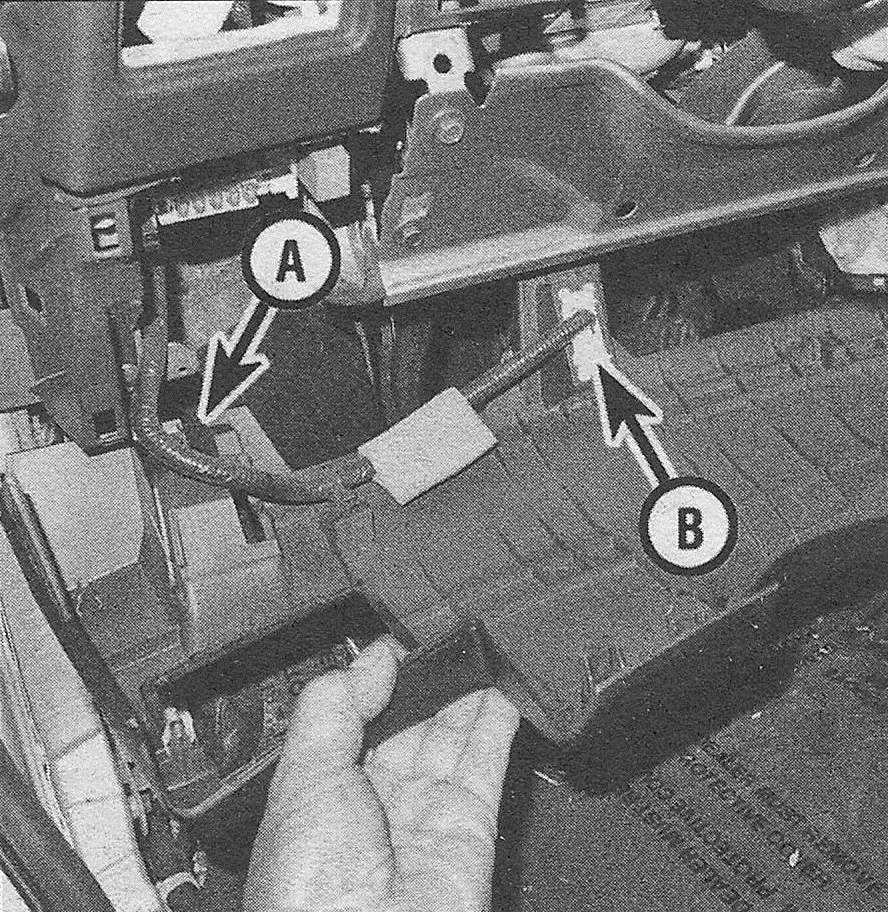
3. Remove the lower knee bolster screw, then disconnect the diagnostic connector and hood release cable (see illustrations).
23.3a Remove the knee bolster screw. .
23.3b … then disconnect the hood release cable (A) and diagnostic connector (B)
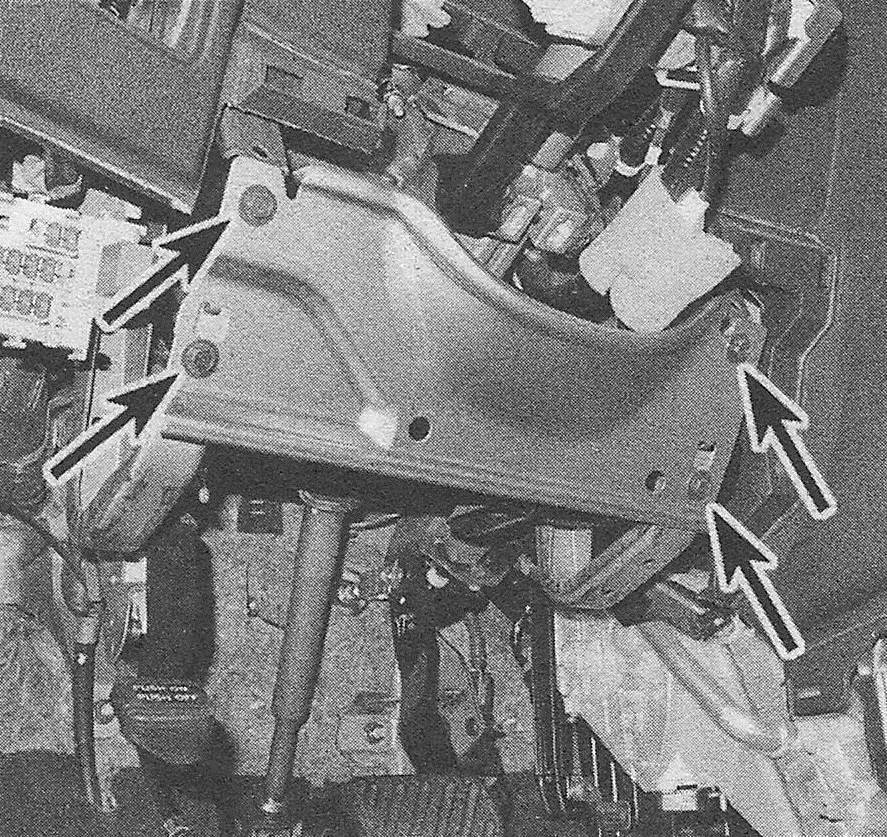
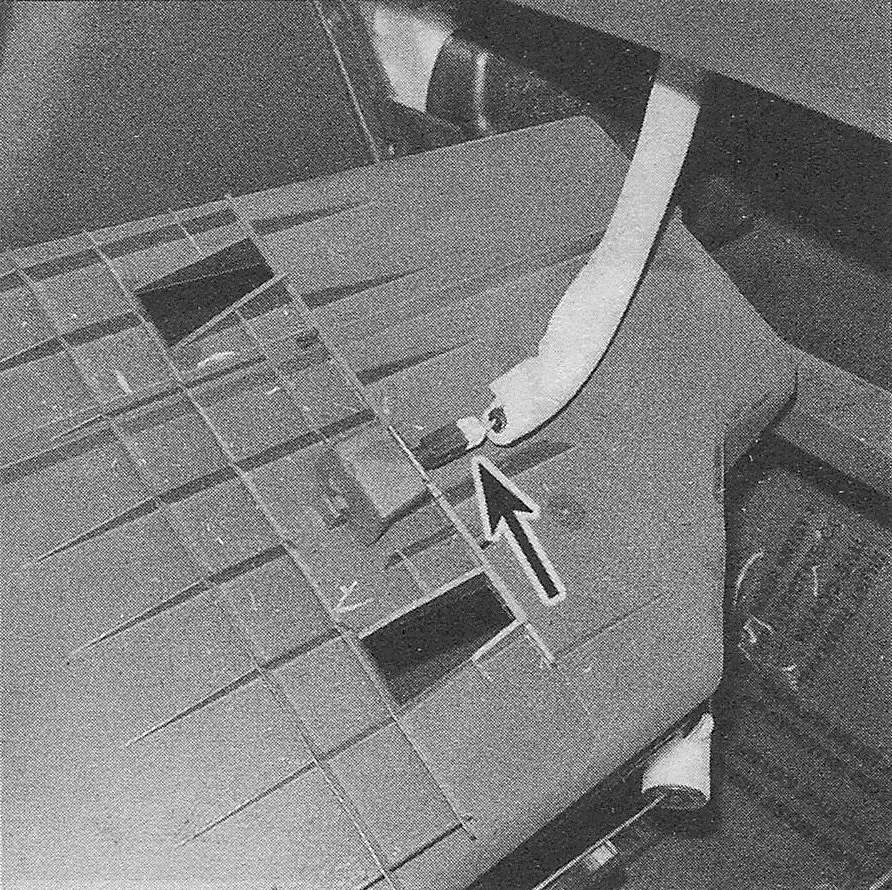
4. Remove the knee bolster support bolts and support (see illustration).
23.4 Knee support bolt locations
5. Installation is the reverse of removal.
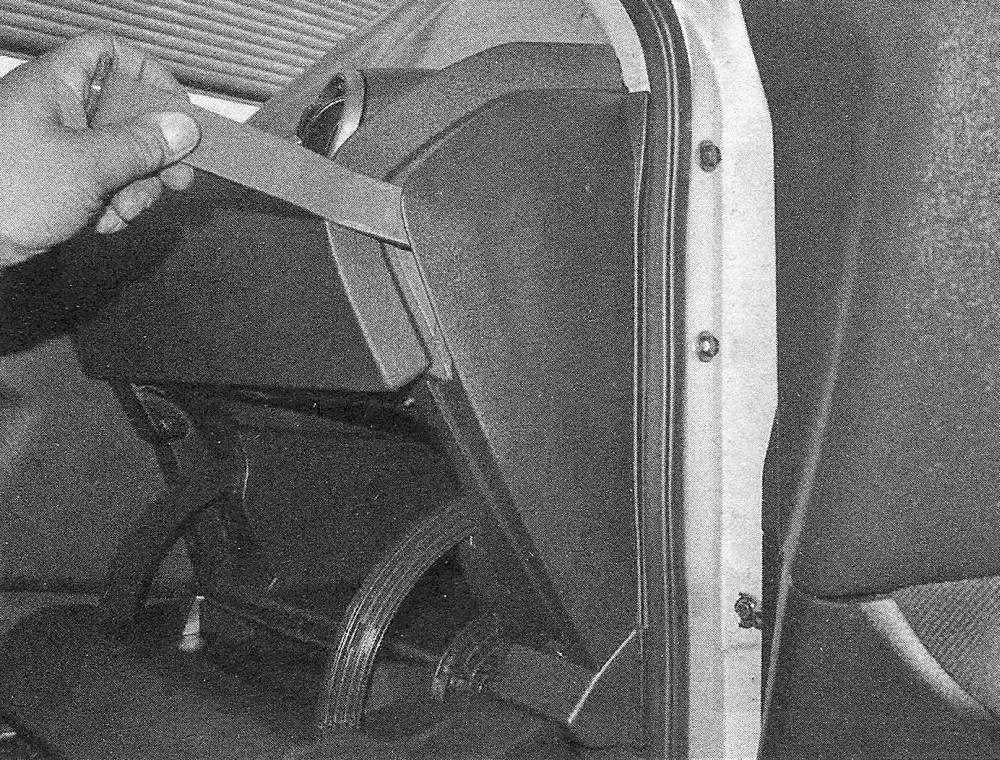
Instrument panel end caps
6. Use a plastic trim tool or a screwdriver wrapped with tape to pry off the end caps (see illustration).
23.6 Pry off the end caps
7. Installation is the reverse of removal.
Glove box
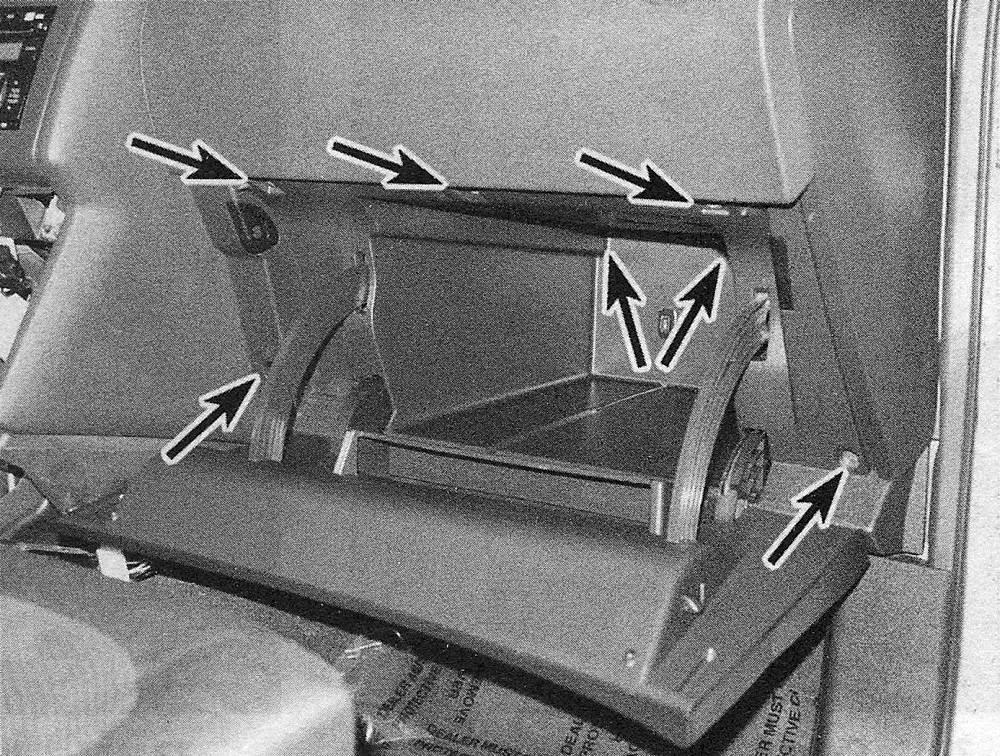
8. Open the glove box and remove the glove box panel screws (see illustration).
23.8 Remove the glove box mounting screws
9. Remove the right-side instrument panel trim (see illustration 23.6).
10. Use a plastic trim tool to pry the glove box away from the dash panel (see illustrations).
23.10a Pry the glove box from the dash panel
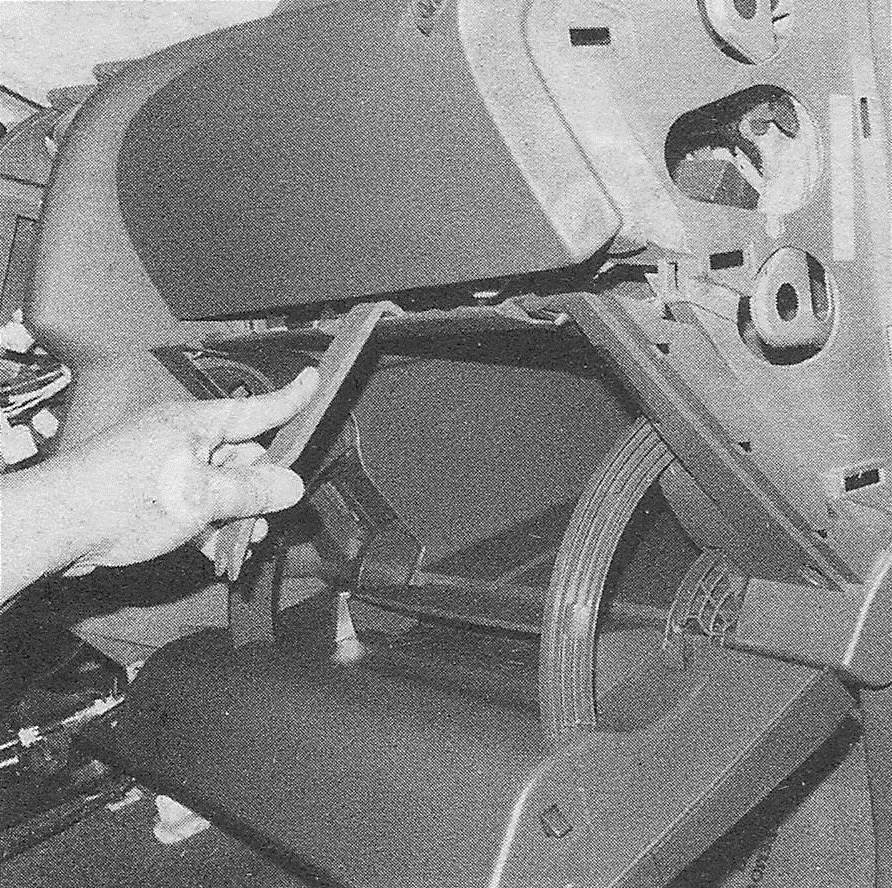
23.10b. …then disconnect the electrica connector and remove the glove box
11. Remove the glove box assembly.
12. Installation is the reverse of removal.
Center trim panel
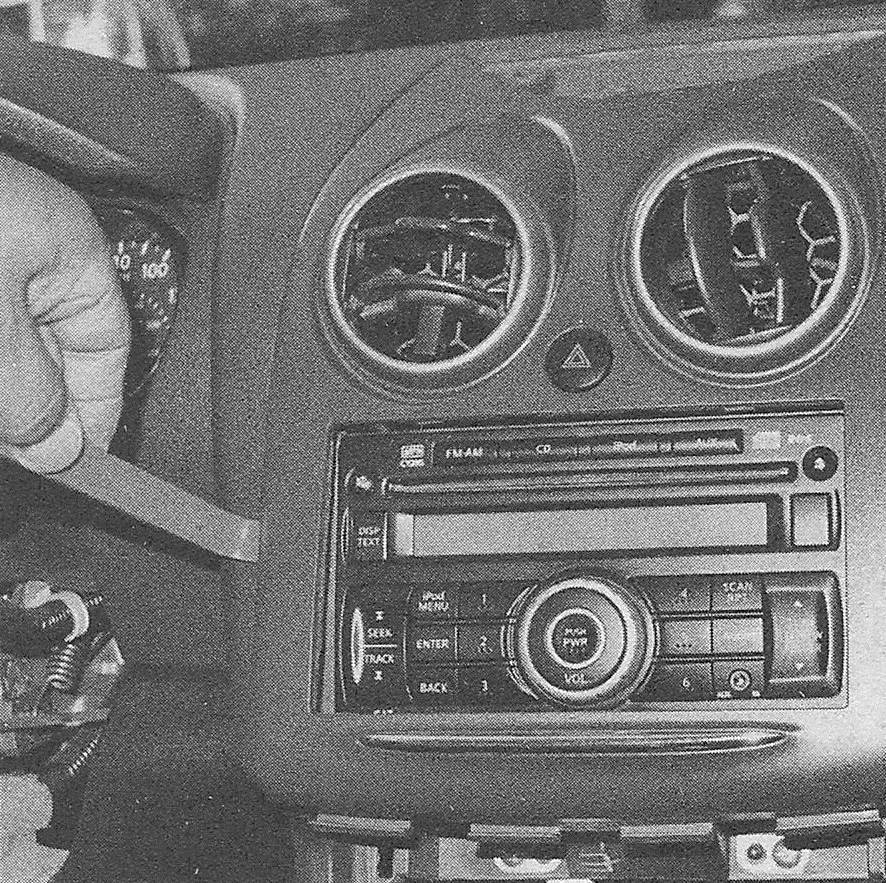
13. Remove the heater and air conditioning control assembly (see Cooling, heating and air conditioning systems).
14. Carefully pry the vent trim panel (see illustration) out of the center of the instrument panel.
23.14 Carefully pry the vent trim panel from the instrument panel
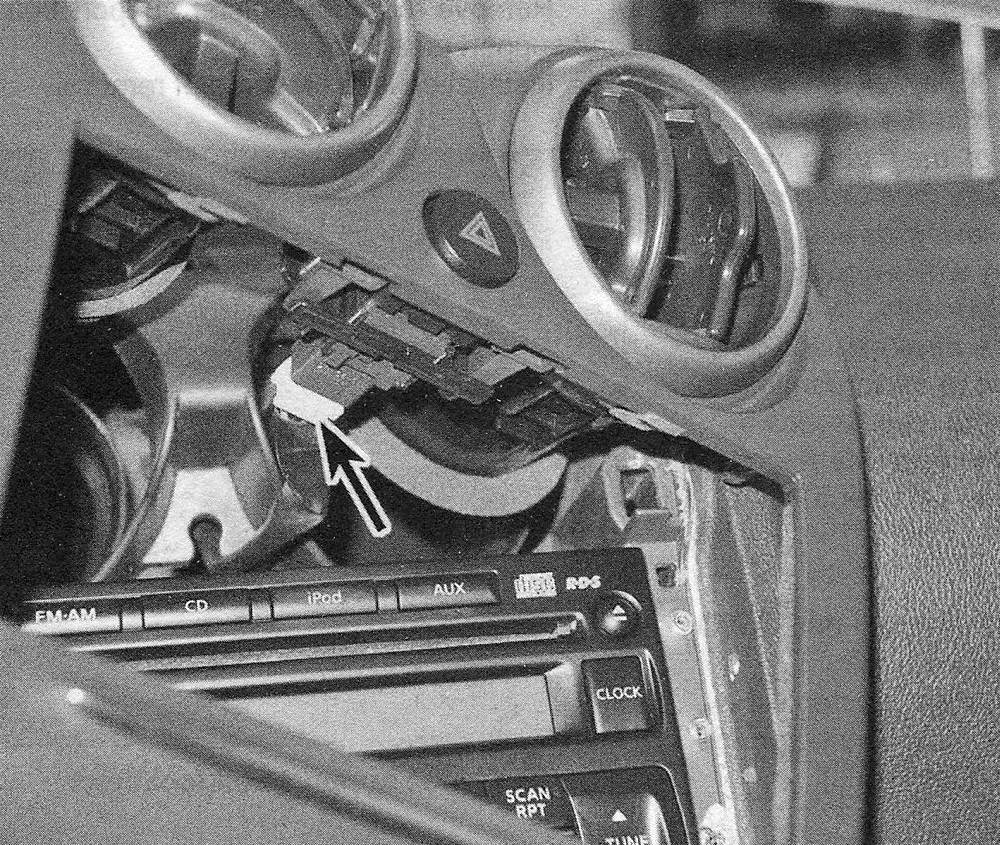
15. Disconnect the electrical connector from the hazard switch (see illustration).
23.15 Disconnect the electrical connector from the hazard switch
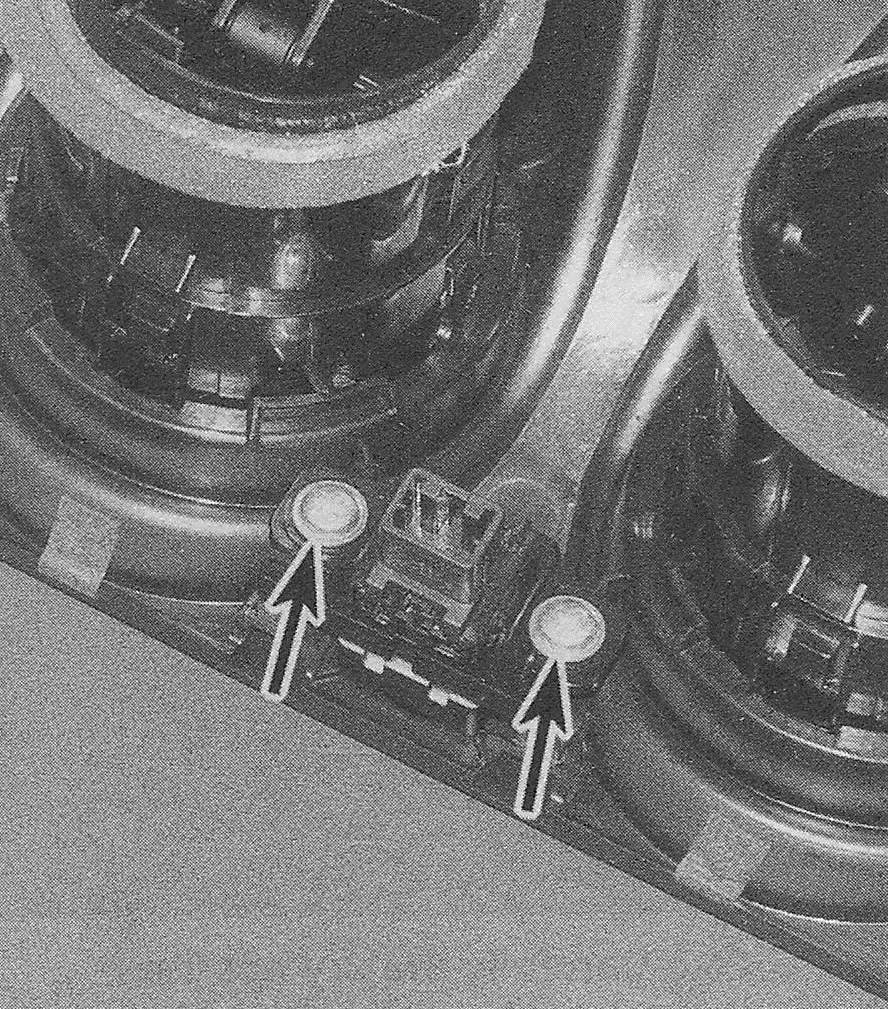
16. If the hazard switch needs to be replaced, remove the mounting screws and switch from the panel (see illustration).
23.16 Remove the hazard switch fasteners
17. Installation is the reverse of removal.
Glove box trim panel (2016 and later models)
Note: 2015 and earlier models, the glove box trim panel and instrument panel are combined into one assembly.
18. Remove the glove box (see 8 through 10).
19. Remove the right-side center trim panel above the glove box opening using a trim stick.
20. Remove the radio (see Chassis electrical system).
21. If not already done, remove the heater and air conditioning control assembly (see Cooling, heating and air conditioning systems).
22. Remove the glove box panel fasteners.
23. Use a trim tool along the edges of the panel and remove the glove box trim panel from the instrument panel.
24. Installation is the reverse of removal.