Rear suspension arms and rear subframe — removal and installation
1. Loosen the rear wheel lug nuts. Raise the rear of the vehicle and support it securely on jack stands. Remove the wheel.
Trailing arm
2. Remove the coil spring (see Coil springs (rear) — removal and installation).
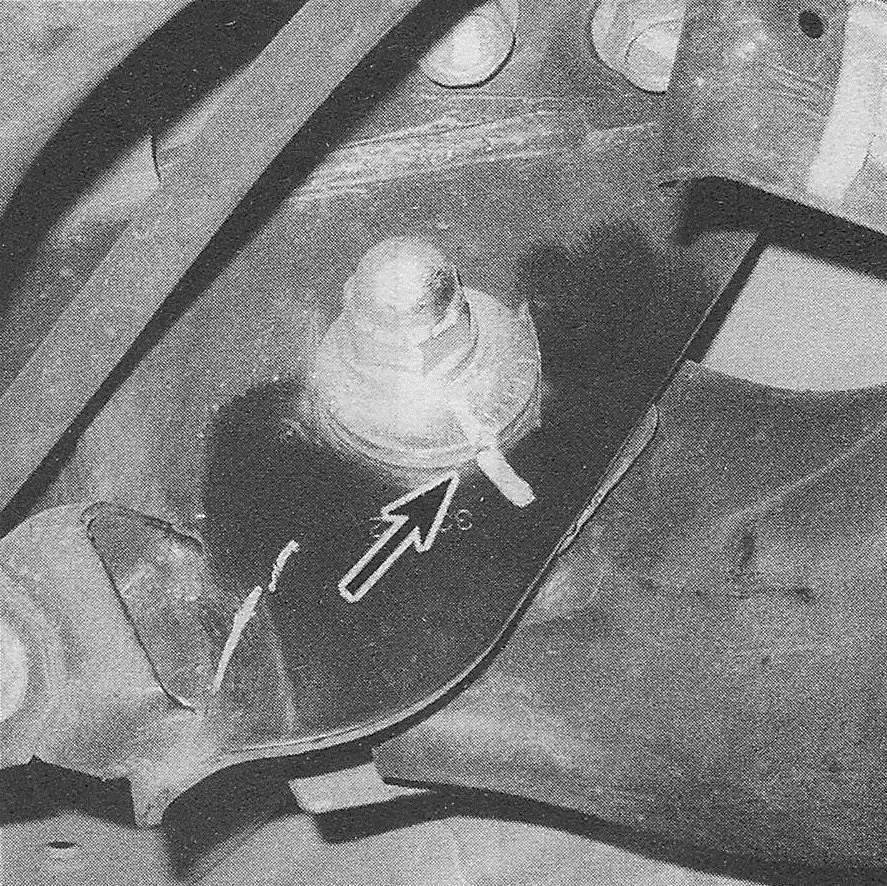
3. Mark the position of the adjuster cams on the pivot bolt to the trailing arm bracket (see illustration).
11.3 Mark the adjuster came to the body bracket
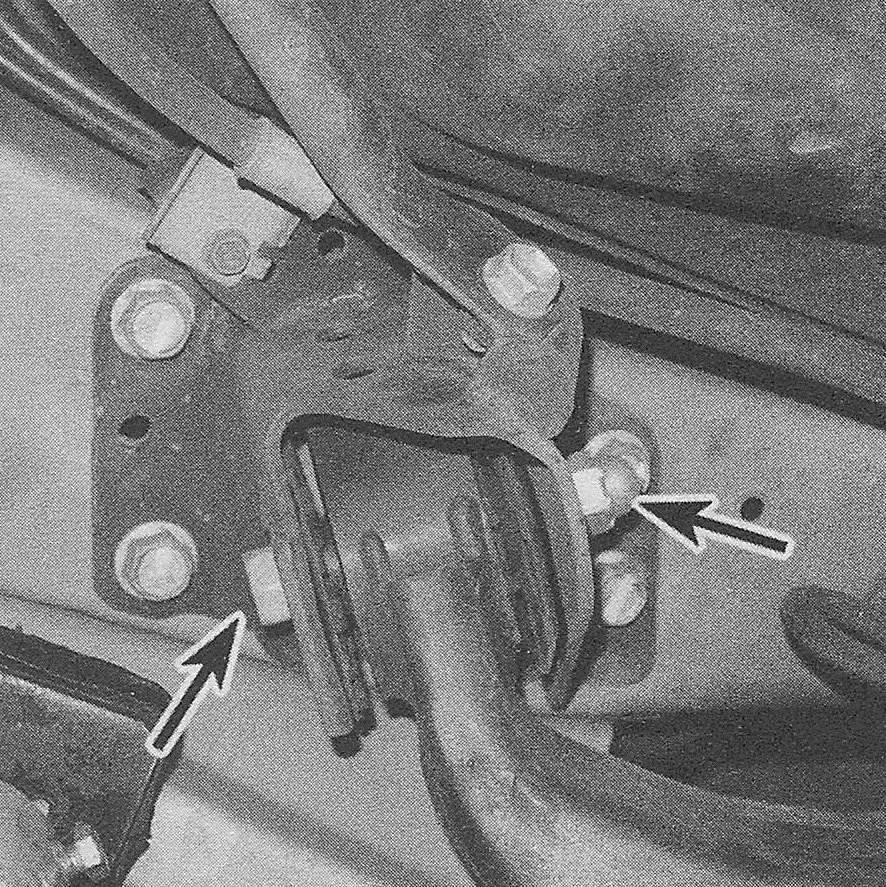
4. Remove the trailing arm-to-body bracket mounting bolt/nut (see illustration).
11.4 Trailing arm-to-bracket mounting bolt
5. Remove the trailing arm from the vehicle.
Note: When the trailing arm is removed, the two rubber washers on either side of the pivot bushing will fall out. Be sure to reinstall them.
6. Installation is the reverse of removal, noting the following points:
- ) Replace the pivot bolt nut with a new
- ) Align the previously made matchmarks on the adjuster cam and the body
- ) Raise the trailing arm with a floor jack until it is at normal ride height, then tighten the trailing arm bolt/nuts to the torque listed this Chapter’s Specifica
- ) Bleed the brake system (see Brakes).
- ) Tighten the wheel lug nuts to the torque listed in Chapter’s 1, Specifications.
- ) Have the wheel alignment checked and, if necessary adjusted.
Lower control arm
7. Remove the stabilizer bar link from the lower control arm (see Stablilizer bar (rear) — removal and installation).
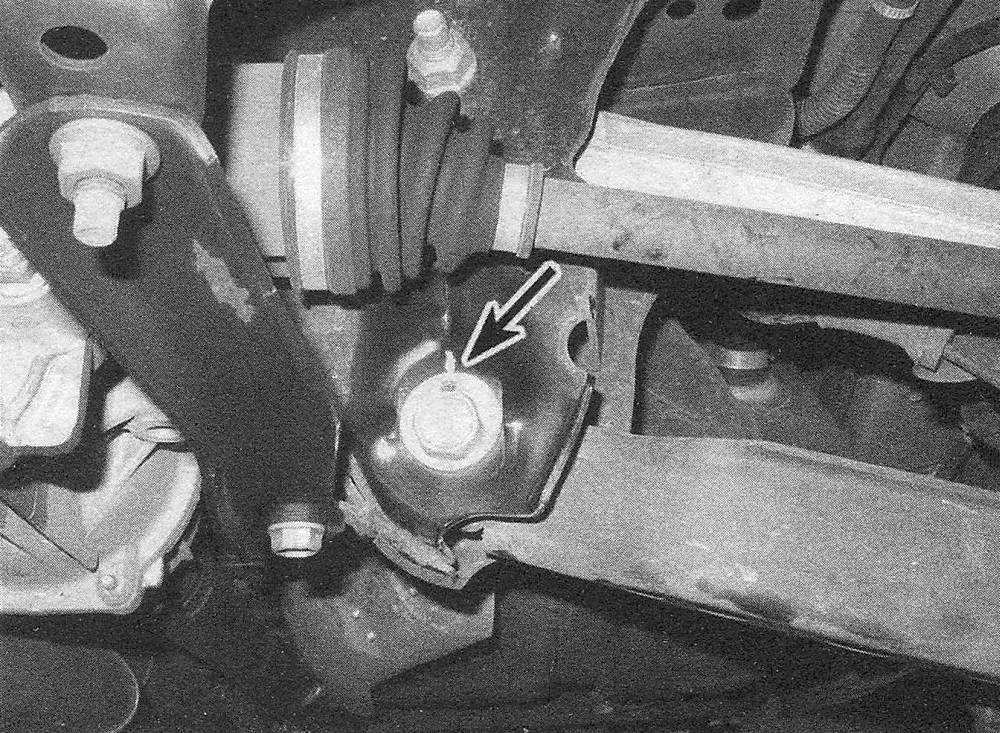
8. Mark the position of the adjuster cams on the inner pivot bolt to the subframe (see illustration).
11.8 Mark the adjuster came to the subframe
9. Support the trailing arm with a floor jack placed under the coil spring pocket.
Warning: The jack must remain in this position until the arm is reinstalled.
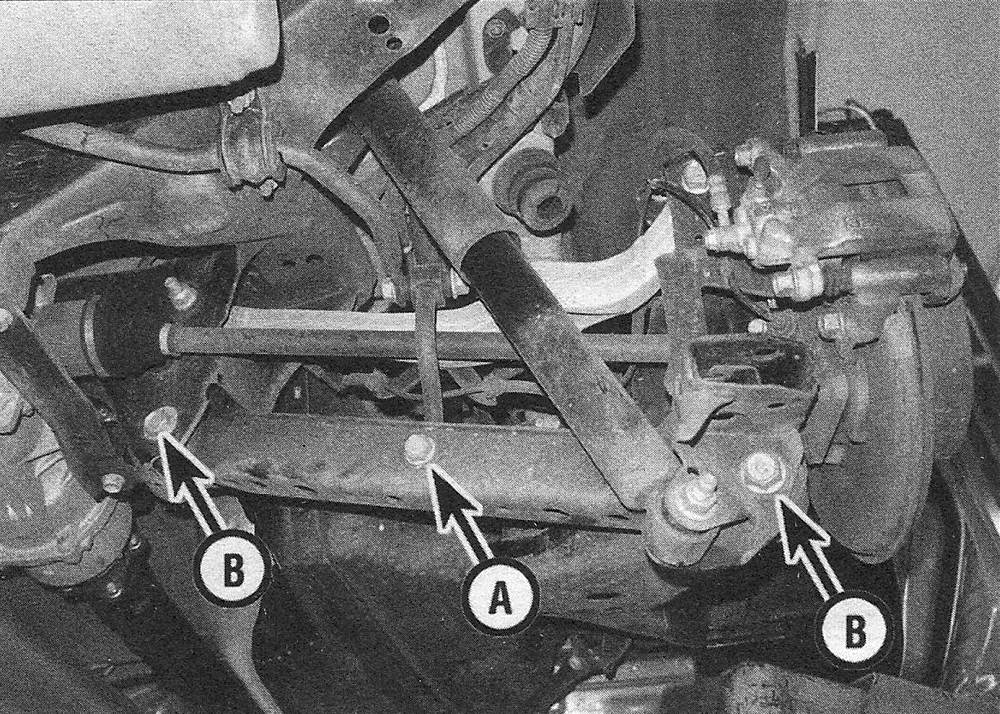
10. Remove the lower control arm-to-subframe and trailing arm pivot bolts/nuts (see illustration).
11.10 Remove the stabilizer link bolt (A) then the lower control arm fasteners (B)
11. Remove the arm from the vehicle’.
12. Installation is the reverse of removal, noting the following points:
13. Replace the pivot bolt nuts with a new one.
- ) Raise the trailing arm with a floor jack until it is at normal ride height, then tighten the control arm bolt/nuts to the torque listed in this Chapter’s Specifica Be sure to align the marks on the adjusting cam and the subframe before tightening the bolt/nut.
- ) Tighten the wheel lug nuts to the torque listed in Tune-up and routine maintenance, Specifications.
- ) Have the wheel alignment checked and, if necessary adjusted.
Upper control arm
14. Support the trailing arm with a floor jack placed under the coil spring pocket. Warning: The jack must remain in this position until the arm is reinstalled.
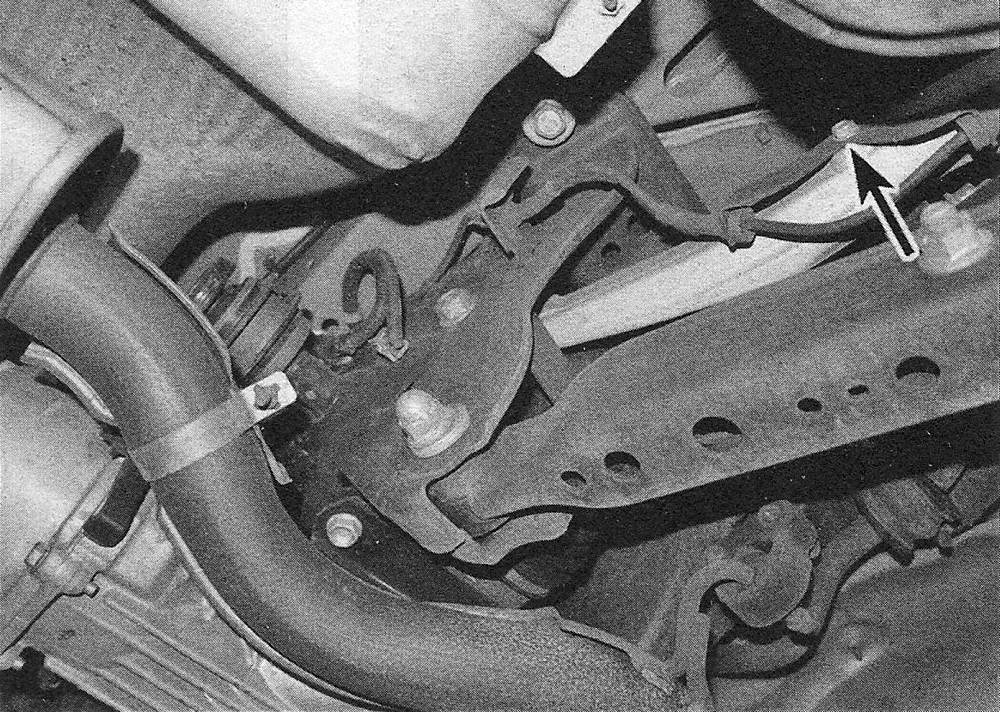
15. Remove the ABS wheel speed sensor harness mounting bolt (see illustration) from the arm and move the harness out of the way.
11.15 Remove the wheel sensor harness fastener from the upper control arm
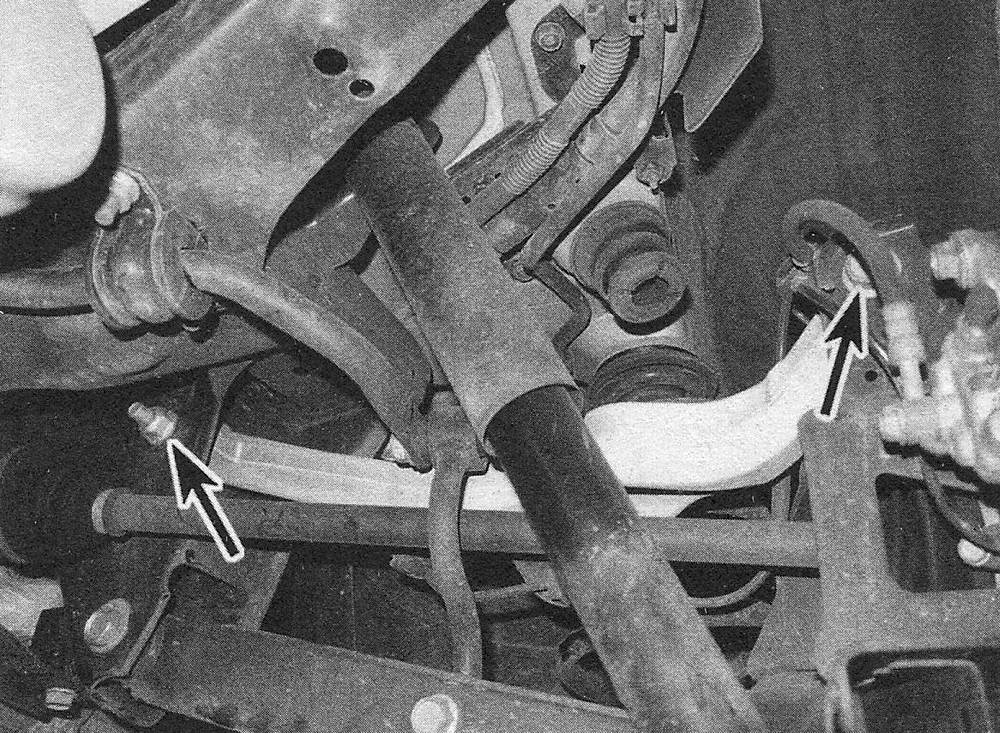
16. Remove the upper control arm-to-subframe and trailing arm pivot bolts/nuts (see illustration).
11.16 Remove the upper control arm fasteners from each end of the arm
17. Remove the arm from the vehicle.
18. Installation is the reverse of removal, noting the following points:
- ) Raise the trailing arm with a floor jack until it is at normal ride height, then tighten the control arm bolt/nuts to the torque listed in this Chapter’s Specifi
- ) Tighten the wheel lug nuts to the torque listed in Tune-up and routine maintenance, Specifications.
Rear subframe
19. Raise the vehicle and support it securely on jack stands.
20. Remove the coil springs (see Coil springs (rear) — removal and installation).
21. Remove the rear section of the exhaust system (see Fuel and exhaust systems).
22. On AWD models, remove the rear differential (see Clutch and driveaxles).
23. Remove the shock absorbers (see Shock absorbers (rear) — removal and installation).
24. Remove the upper and lower control arms as described earlier in this Section.
25. Remove the stabilizer bar (see Stablilizer bar (rear) — removal and installation).
26. Disconnect the wiring harness from the rear subframe.
27. Place two floor jacks under the rear sub-frame so it is securely supported.
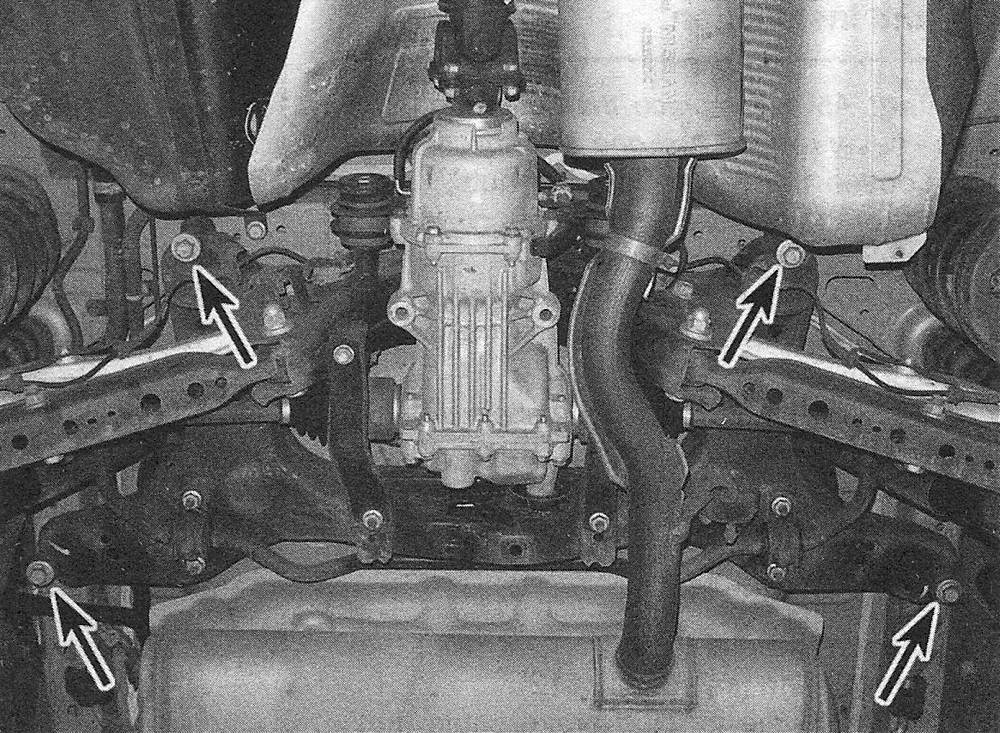
28. Remove the subframe mounting bolts, then carefully lower the rear subframe a little at a time until it is clear of the body of the vehicle (see illustration).
11.28 Location of the rear subframe mounting points
29. Installation is the reverse of removal. Tighten all subframe and suspension fasteners to the torque values listed in this Chapter’s Specifications. Tighten the wheel lug nuts to the torque listed in the Tune-up and routine maintenance Specifications.
Note: Before tightening the suspension fasteners, raise the trailing arm with a floor jack until it is at normal ride height.